If you’re looking for a delightful summer dessert that’s as easy as it is delicious, this No-Bake Cheesecake Jars with Yogurt and Fresh Berries Recipe is going to be your new favorite treat. Creamy, tangy, and irresistibly fresh, each jar is a little treasure chest of smooth cream cheese filling, subtly sweetened yogurt, and bursts of vibrant, juicy berries. Ready in just 20 minutes with only seven simple ingredients, this gluten-free friendly dessert marries convenience with classic flavor in the most charming way possible. Perfect for a sunny afternoon or an impromptu gathering, these jars bring a fresh, homemade touch to any occasion.
Ingredients You’ll Need
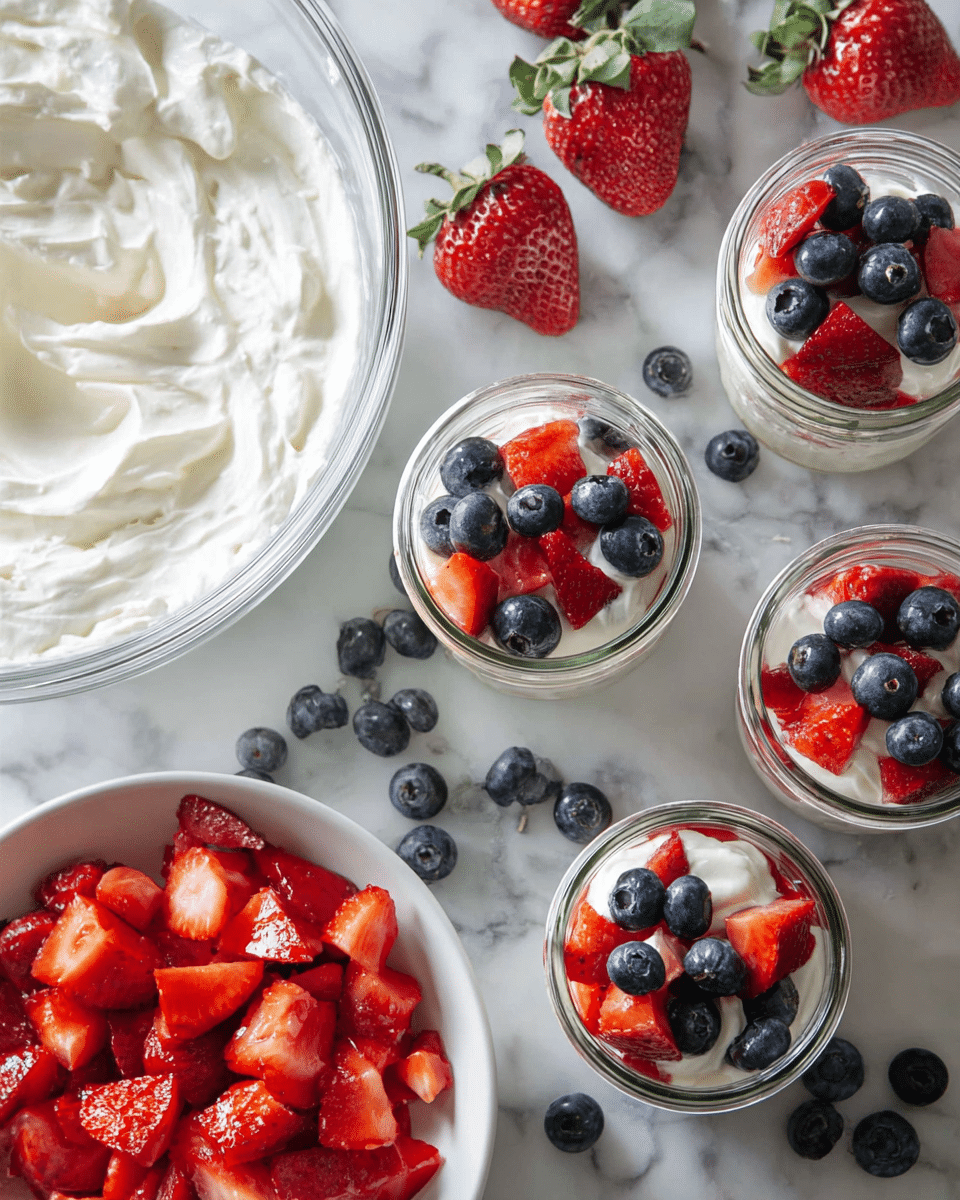
Don’t be fooled by the simplicity of these ingredients; each one plays a starring role in creating the perfect balance of texture, sweetness, and color in the No-Bake Cheesecake Jars with Yogurt and Fresh Berries Recipe. From the crunchy base to the creamy filling, everything comes together effortlessly to make your dessert shine.
- ½ cup graham cracker crumbs: The crunchy foundation providing satisfying texture and buttery flavor.
- 2 tablespoons softened butter or ghee: Binds the crumbs together while adding richness.
- 1 (8 ounce) package cream cheese, softened: Creates the luxuriously creamy and tangy base for the cheesecake filling.
- 3 tablespoons granulated sugar: Balances the tang of the cream cheese and yogurt with subtle sweetness (adjust if using sweetened yogurt).
- ⅔ cup vanilla or plain Greek yogurt or Skyr yogurt: Adds a fresh, light texture and tangy brightness; 2% or whole milk recommended for creaminess.
- ½ teaspoon vanilla extract: Brings a warm depth of flavor to the filling.
- 1 teaspoon lemon juice: Enhances the freshness and lifts the entire mixture.
- Fresh berries: Chopped strawberries, blueberries, and raspberries add juicy bursts of flavor and colorful contrast.
How to Make No-Bake Cheesecake Jars with Yogurt and Fresh Berries Recipe
Step 1: Make the Crust
Start by turning those graham crackers into fine crumbs using a small food processor or blender – it’s quick and gives you that perfect crunchy texture. Next, mix the crumbs with softened butter until they’re evenly moistened; this mixture will pack into your jars to form a buttery, crisp base that contrasts beautifully with the creamy topping.
Step 2: Prepare the Cheesecake Filling
Using an electric mixer, beat the softened cream cheese and granulated sugar together until the mixture becomes light and fluffy – this is key for that melt-in-your-mouth texture. Then add the yogurt, vanilla extract, and lemon juice, mixing at medium-high speed until everything is thick, smooth, and perfectly blended. The yogurt adds a wonderful tang and lightness that balances the richness of the cream cheese.
Step 3: Assemble the Jars
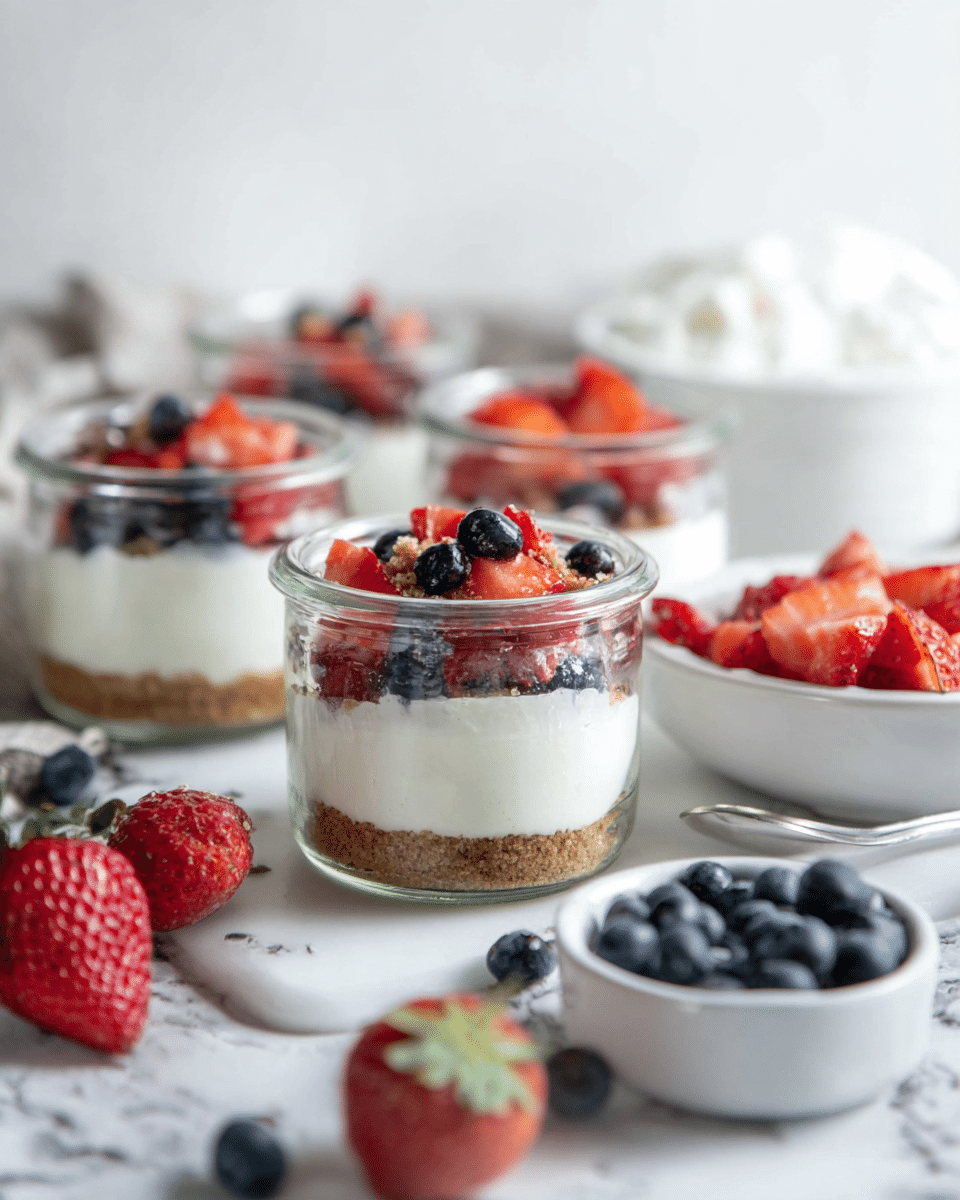
Layer about one and a half tablespoons of the crust mixture in the bottom of each jar, lightly pressing down to create a firm foundation. Spoon the luscious cream cheese-yogurt filling over the crust, dividing it evenly among the jars. Top with freshly chopped berries, either sprinkled on top or layered to your preference, creating a colorful, appealing presentation. These cheesecake jars can be enjoyed immediately or chilled for a few hours to let the flavors meld even more.
How to Serve No-Bake Cheesecake Jars with Yogurt and Fresh Berries Recipe
Garnishes
To take your cheesecake jars to the next level, garnish with a few extra fresh berries or a sprig of mint for a pop of color and a refreshing twist. A light drizzle of honey or a dusting of powdered sugar can also add a special touch that makes them look as good as they taste.
Side Dishes
This dessert pairs beautifully with a crisp glass of freshly squeezed juice or a refreshing iced herbal tea, perfect for a hot summer day. For a more indulgent treat, serve alongside a small scoop of vanilla bean ice cream — the creamy coldness complements the tangy jars spectacularly.
Creative Ways to Present
If you want to impress your guests, consider layering the berries between the crust and cheesecake filling for a beautiful striped effect. Using different sized jars or cups can create a charming dessert display, perfect for parties. You might even add a decorative spoon tied with a ribbon around each jar for a gift-like presentation.
Make Ahead and Storage
Storing Leftovers
If you have any leftover No-Bake Cheesecake Jars with Yogurt and Fresh Berries Recipe, store them covered in the refrigerator. They’ll stay fresh and tasty for up to four days, giving you an easy grab-and-go dessert for busy days ahead.
Freezing
While the texture might change slightly, you can freeze these jars if needed. Be sure to leave space at the top for expansion and thaw them overnight in the fridge before enjoying. Fresh berries may become softer after freezing, so consider adding fresh fruit after thawing for the best experience.
Reheating
This dessert is best served chilled and isn’t intended to be reheated. Simply enjoy it straight from the fridge or at room temperature for a luscious, creamy treat any time.
FAQs
Can I use a different type of crust for the No-Bake Cheesecake Jars with Yogurt and Fresh Berries Recipe?
Absolutely! While graham cracker crumbs are classic, you can try crushed digestive biscuits, gluten-free cookies, or even crushed nuts mixed with a little butter for a nutty twist. Just ensure the crust packs well to hold the filling.
What yogurt works best in this recipe?
Greek yogurt or Skyr with 2% or whole milk fat are ideal as they provide creaminess without extra sourness. Plain yogurt works, but vanilla adds a lovely sweetness and depth. Avoid low-fat or non-fat options if you want a richer texture.
Is this recipe suitable for those with gluten allergies?
Yes, as long as you use gluten-free graham crackers or an alternative gluten-free crust, this recipe is perfect for gluten-free diets. Always double-check your ingredient labels to be safe.
Can I make the No-Bake Cheesecake Jars with Yogurt and Fresh Berries Recipe ahead of time?
Definitely! These jars hold up well in the fridge for up to four days, making them a fantastic option for meal prep or entertaining ahead of time. Just add fresh berries right before serving for maximum freshness.
How can I reduce added sugar without sacrificing taste?
Try using vanilla-flavored yogurt that already contains some sweetness and reduce or omit the extra granulated sugar. You can also sweeten with natural alternatives like honey or maple syrup, adjusted to your preference.
Final Thoughts
There’s something so wonderfully satisfying about a dessert that’s quick to make, beautifully balanced in flavor, and perfectly portioned, and the No-Bake Cheesecake Jars with Yogurt and Fresh Berries Recipe ticks every box. Whether you’re treating yourself or sharing with friends, these jars bring a fresh burst of summer sweetness with every spoonful. I can’t wait for you to try it and see just how effortless and delightful a homemade cheesecake dessert can be!
Print
No-Bake Cheesecake Jars with Yogurt and Fresh Berries Recipe
- Prep Time: 20 minutes
- Cook Time: 0 minutes
- Total Time: 20 minutes
- Yield: 4 jars
- Category: Dessert
- Method: No-Cook
- Cuisine: American
- Diet: Gluten Free
Description
These No-Bake Cheesecake Jars are a quick and easy dessert made with creamy yogurt and cream cheese, sweetened lightly and topped with fresh summer berries. Perfect for a gluten-free, refreshing summer treat that requires no baking and is ready in just 20 minutes.
Ingredients
Crust
- ½ cup graham cracker crumbs (about 8 graham crackers)
- 2 tablespoons softened butter or ghee
Cheesecake Filling
- 1 (8 ounce) package cream cheese, softened
- 3 tablespoons granulated sugar (adjust if using sweetened yogurt)
- ⅔ cup vanilla or plain Greek yogurt or Skyr yogurt (preferably 2% or whole milk)
- ½ teaspoon vanilla extract
- 1 teaspoon lemon juice
Topping
- Fresh berries (chopped strawberries, blueberries, and/or raspberries)
Instructions
- Make the crust: In a small food processor or blender, process the graham crackers into fine crumbs. Transfer the crumbs to a bowl and mix with the melted butter until all crumbs are moistened. Divide the crumb mixture evenly into four 7-ounce jars, pressing down firmly with the back of a spoon to form the crust base. Set aside.
- Make the cheesecake filling: In a medium mixing bowl, use an electric hand mixer to beat the softened cream cheese together with the granulated sugar until the mixture is light and fluffy. Add the yogurt, vanilla extract, and lemon juice, then continue mixing on medium-high speed until the filling is thick, smooth, and well combined.
- Assemble jars: Spoon and evenly distribute the cheesecake filling over the graham cracker crust in each jar. Top or layer with fresh chopped berries as desired. These jars can be served immediately or covered and refrigerated if preparing ahead.
- Serve and enjoy: Enjoy your fresh, no-bake cheesecake jars as a quick summer dessert. For best texture, chill if possible, but not required.
Notes
- If using sweetened vanilla yogurt, taste test before adding granulated sugar to avoid excess sweetness.
- This recipe easily doubles for up to 8 servings; consider using taller dessert shooter jars for more portions.
- Store leftover cheesecake jars covered in the refrigerator for up to 4 days.

