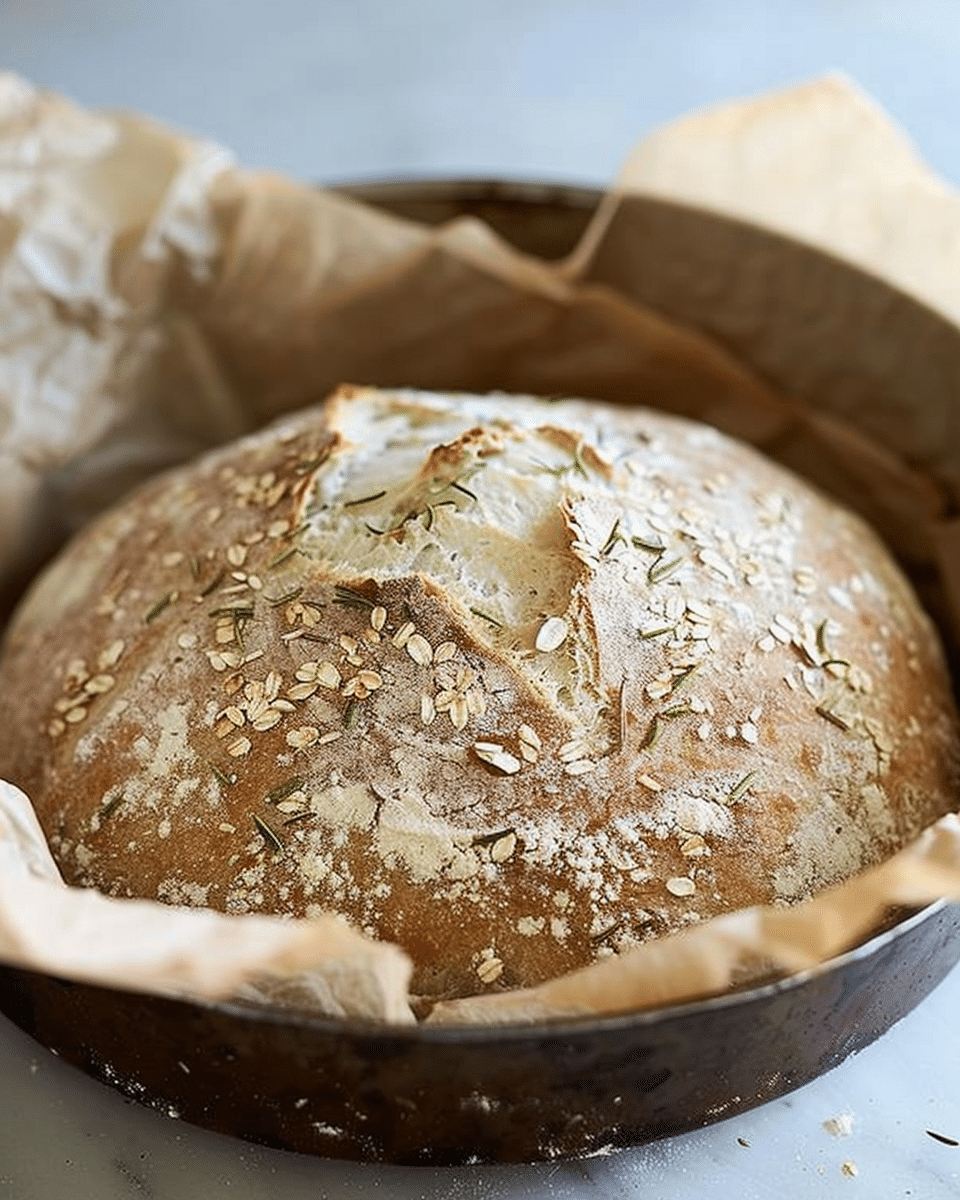
Why You’ll Love This Recipe
-
True “mix at night, bake in the morning” convenience
-
Beginner-friendly method with simple stretch-and-folds (no kneading)
-
Bakes in a dutch oven for impressive oven spring and crust
-
Flexible: add seeds, herbs, or a touch of whole grain
-
Consistently flavorful, with options for a tangier, more sour loaf

Ingredients
(Tip: You’ll find the full list of ingredients and measurements in the recipe card below.)
-
4 cups white bread flour, spooned and leveled (520 g)
-
2 teaspoons fine sea salt (12 g)
-
1 7/8 cups water (385 g)
-
90 g active sourdough starter (about 1/3 cup), fed 8–12 hours earlier and used just after it peaks
-
Rice flour, for dusting a banneton or towel (optional)
Optional add-ins (choose any):
-
Seeds (for flavor and texture): fennel (1 tsp), caraway (1/2 tsp), chia (1 tbsp), or use sesame, poppy, flax, nigella, etc.
-
Whole-grain swap: substitute up to 1/2 cup (about 62 g) rye, spelt, or whole wheat for the same amount of bread flour
-
Herbs: rosemary, thyme, or sage
-
Savory or chunky additions: olives, roasted garlic, nuts, dried fruit, or cheese (fold in lightly after the first rest)
Directions
-
Feed the starter (morning): About 12 hours before mixing, feed your starter and leave it at room temperature until it doubles and just passes its peak. If your starter was fed within the last week and kept refrigerated, you can use it cold straight from the jar, but expect a milder flavor.
-
Mix the dough (evening, around 8:00 p.m.): In a medium bowl, whisk flour and salt (and any dry spices or seeds). In a separate bowl, whisk starter and water until cloudy. Pour the liquid into the flour and stir with a spoon until every bit of flour is moistened; the dough will be thick and shaggy. Cover and rest 15 minutes.
-
Strengthen with stretch-and-folds (about 8:20 p.m.): With one wet hand, grab an edge of dough, stretch it up, and fold it over the center. Quarter-turn the bowl and repeat for 30 seconds, until the dough tightens slightly. Cover, rest 15 minutes, then repeat once more. Turn the dough over in the bowl.
-
Bulk ferment overnight: Cover the bowl well and leave it at room temperature (ideal 68–70°F/20–21°C) for 8–12 hours. In warmer rooms, begin checking at 6–8 hours; in very cool rooms, it may take up to 18 hours.
-
Morning check (6–8 a.m.): The dough should look airy and about 1.5–1.75× its original size with a gentle dome. Do the poke test: a floured finger should leave an indentation that slowly springs back. If it’s very tight, let it rise longer; if it’s loose and collapses, it’s slightly over-proofed—bake anyway.
-
Prepare the vessel: Line a medium, high-sided bowl with parchment (or use a well-rice-floured banneton). Lightly oil your parchment if you’re unsure whether it sticks.
-
Final stretch and shape: With wet fingers or a wet scraper, loosen the dough from the bowl. Lift it straight up in the center 1–2 feet to stretch, then let it fold onto itself. Give the bowl a quarter-turn and repeat once or twice, pausing 30–60 seconds between stretches. On the last stretch, lift and fold the dough into the parchment-lined bowl (or into the banneton, seam-side up; pinch closed if needed). Dust and seed the surface if you like.
-
Chill and preheat: Refrigerate the shaped dough, uncovered, for 1 hour to firm up and improve scoring. Meanwhile, place a dutch oven with lid in your oven and preheat to 500°F (260°C) for a full hour. Convection helps if you have it. (450–475°F/230–246°C also works; adjust covered time slightly longer.)
-
Score: Set the dough near the stove. Carefully remove the hot dutch oven, close the oven door, and take off the lid. Score the dough 3/4–1 inch (2–2.5 cm) deep at a 45° angle—one long slash is fine, or add simple designs. Lift the parchment and lower dough into the pot; cover promptly.
-
Bake—covered then uncovered: Bake covered at 500°F for 20 minutes with convection (25 minutes without, or 28 minutes at 450°F). Remove the lid; the loaf should be puffed and lightly golden, near 200°F internally. Reduce oven to 450°F and bake 10–15 minutes more until deeply golden with an internal temperature of 204–208°F (95–98°C). For a thinner crust, extend covered time and shorten uncovered time.
-
Cool completely: Remove the loaf from the pot and cool on a rack at least 1 hour before slicing to preserve the crumb.
-
Serve: Slice and toast for peak flavor. Top with butter, olive oil, avocado, jam, or anything you love.
Servings and timing
-
Yield: 1 standard loaf (about 12–14 slices)
-
Prep time: about 13 hours (mostly overnight bulk fermentation)
-
Cook time: 35 minutes
-
Total time: about 13 hours 35 minutes
-
Active hands-on time: roughly 20–25 minutes (mixing, folds, shaping, scoring)
Variations
-
Seed-crusted: Press sesame, poppy, or mixed seeds onto the surface before the final chill.
-
Country blend: Swap 1/2 cup (62 g) whole wheat, rye, or spelt into the dough.
-
Olive–rosemary: Fold in chopped olives and minced rosemary after the first rest.
-
Garlic–herb: Gently work in roasted garlic and thyme.
-
Fruit & nut: Add chopped dried figs or raisins with toasted walnuts or pecans.
-
Two small loaves: Divide after the overnight rise, shape, chill, and bake each at 450°F about 18 minutes covered (to ~200°F), uncover, then finish at 425°F until 204–208°F.
-
Loaf pan: Shape and place in a lightly oiled or parchment-lined loaf pan for the final chill; bake at 450°F for 15 minutes, then 425°F until 204–208°F internally.
-
No dutch oven: Bake on a sheet pan covered with a large metal or heatproof glass bowl for 25–30 minutes, then uncover and finish 10–15 minutes until golden.
Storage/Reheating
-
Room temperature: Keep wrapped in a clean kitchen towel for 1–2 days to maintain a crisp crust, then move to a zip-top bag to retain moisture.
-
Freezer: Slice, then freeze in a bag up to 2 months; toast slices straight from frozen.
-
Revive crust: Bake the whole loaf or large pieces at 375°F (190°C) for 8–10 minutes.
-
Leftovers: Cube and toast for croutons, or blitz into bread crumbs.
FAQs
Can I use all-purpose flour instead of bread flour?
Yes. The crumb will be slightly less chewy and the dough a touch softer. If using all-purpose, start with 10–15 g less water and add as needed.
How do I know my starter is ready?
It should at least double after feeding, smell pleasantly tangy, and pass the float test (a spoonful floats in water). Using it just after the peak gives reliable rise.
My dough seems over-proofed in the morning—what now?
Bake it anyway. Handle gently, shape once to build a little strength, chill briefly, score, and bake. Expect a slightly flatter loaf but still great flavor.
What if my kitchen is warmer or cooler than 68–70°F (20–21°C)?
In warmth, bulk fermentation will shorten; begin checking at 6 hours. In cooler temps, it can take up to 18 hours. Watch the dough’s volume and poke test rather than the clock.
Do I really need a dutch oven?
It helps trap steam for maximum oven spring and crust, but you can mimic it by covering the loaf with a large metal or glass bowl on a preheated sheet pan.
How deep should I score?
Aim for 3/4–1 inch (2–2.5 cm) at a 45° angle. Too shallow and the loaf may burst elsewhere; too deep and it can spread rather than rise.
What internal temperature should I target?
About 204–208°F (95–98°C) when finished. It will read near 200°F just after the covered phase; finish uncovered to color and cook through.
How can I make the bread more sour?
Use a starter that hasn’t been fed for 4–6 days (kept refrigerated), extend the cold retard after shaping, or ferment slightly longer—while avoiding over-proofing.
Can I add lots of whole grain?
Start with just 1/2 cup (62 g) swapped in. Higher amounts absorb more water and can weigh down the loaf until you’ve practiced hydrations and timing.
My dough is very sticky—did I do something wrong?
Sticky is normal for higher-hydration doughs. Keep hands and tools slightly wet, use quick confident movements, and rely on the stretch-and-folds and cold rest to firm it up.
Conclusion
This overnight sourdough keeps the process simple and the results exceptional: a burnished crust, tender crumb, and complex flavor with minimal hands-on time. Master the core method, then riff with seeds, herbs, or whole grains—your new everyday loaf starts here.
Print
Easy Sourdough Bread with Starter
- Prep Time: 13 hours (mostly overnight fermentation)
- Cook Time: 35 minutes
- Total Time: 13 hours 35 minutes
- Yield: 1 standard loaf (12–14 slices)
- Category: Bread
- Method: Baking
- Cuisine: American
- Diet: Vegetarian
Description
A no-fuss, overnight sourdough bread made with starter. The dough is mixed in the evening, left to ferment overnight, and baked in the morning for a golden crust, airy crumb, and rich flavor—perfect for toast, sandwiches, or serving warm with butter.
Ingredients
4 cups (520 g) white bread flour, spooned and leveled
2 teaspoons (12 g) fine sea salt
1 7/8 cups (385 g) water
90 g active sourdough starter (about 1/3 cup), fed 8–12 hours earlier
Rice flour, for dusting banneton or towel (optional)
Optional add-ins:
1 tsp fennel seeds, or
1/2 tsp caraway seeds, or
1 tbsp chia seeds, or
Sesame, poppy, flax, or nigella seeds
Up to 1/2 cup (62 g) whole grain flour (rye, spelt, or whole wheat)
Fresh herbs such as rosemary, thyme, or sage
Optional savory or chunky additions: olives, roasted garlic, nuts, dried fruit, or cheese
Instructions
- Feed the starter 12 hours before mixing and allow it to peak.
- In the evening, whisk together flour, salt, and any dry add-ins. In another bowl, whisk starter and water until cloudy. Mix wet into dry until combined. Rest 15 minutes.
- Perform stretch-and-folds for 30 seconds, rest 15 minutes, and repeat once more.
- Cover and bulk ferment at room temperature (68–70°F/20–21°C) for 8–12 hours.
- In the morning, check if dough has risen 1.5–1.75× in size and passes the poke test.
- Prepare a parchment-lined bowl or rice-floured banneton.
- Stretch and shape dough, then transfer seam-side down (or up if in banneton). Optionally dust or seed the surface.
- Refrigerate dough uncovered for 1 hour while preheating a dutch oven to 500°F (260°C) for 1 hour.
- Score the dough 3/4–1 inch deep at a 45° angle, then transfer to the hot dutch oven.
- Bake covered for 20 minutes at 500°F (25 minutes without convection, or 28 minutes at 450°F).
- Uncover, reduce oven to 450°F, and bake an additional 10–15 minutes until golden brown and internal temperature is 204–208°F (95–98°C).
- Cool completely on a rack at least 1 hour before slicing.
- Serve sliced, toasted, or with toppings of your choice.
Notes
For a tangier flavor, extend the cold retard in the fridge after shaping.
If over-proofed, bake anyway—flavor remains excellent though loaf may be flatter.
No dutch oven? Use a sheet pan covered with a large oven-safe bowl.
Slice and freeze for up to 2 months; toast straight from frozen.
For different flavors, try seed-crust, olive-rosemary, garlic-herb, or fruit-and-nut variations.
Nutrition
- Serving Size: 1 slice (1/14 loaf)
- Calories: 160
- Sugar: 0g
- Sodium: 170mg
- Fat: 0.5g
- Saturated Fat: 0g
- Unsaturated Fat: 0.5g
- Trans Fat: 0g
- Carbohydrates: 33g
- Fiber: 1g
- Protein: 5g
- Cholesterol: 0mg


